Mastering Food Photography: Capturing the Perfect Shot
Food photography is more than just taking a quick picture—it’s about capturing the essence of a dish in a way that makes people want to reach through the screen and take a bite. Whether you’re a home cook, a food blogger, or a restaurant owner, knowing how to take the perfect food photo can make all the difference. By understanding lighting, angles, styling, and editing, you can transform ordinary meals into mouthwatering masterpieces.
Lighting is Everything
Lighting is the foundation of good photography, and natural light is your best friend when it comes to food photography. Instead of using flash, position your dish near a window or shoot outdoors to capture soft, natural tones. Direct flash can wash out colors and create unappealing shadows, making the food look unappetizing. If you’re taking photos at night, use warm lighting sources like diffused LED lights or softbox setups to avoid harsh glare and unflattering shadows. Reflectors can also help bounce light back onto the dish, highlighting textures and colors without overexposing any part of the image.

Find the Best Angle
Not all dishes look great from the same perspective, so finding the right angle is crucial. Some meals shine in an overhead flat lay, while others look best from the side. Consider these general guidelines:
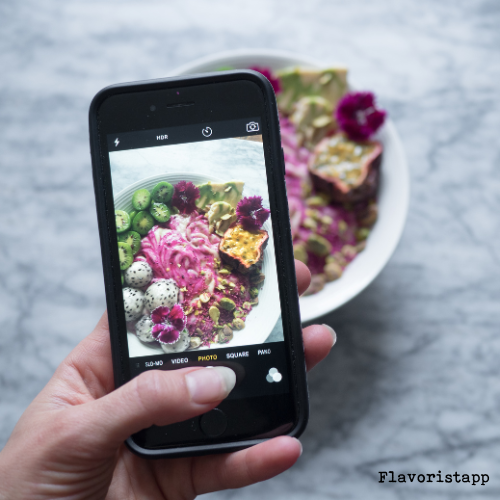
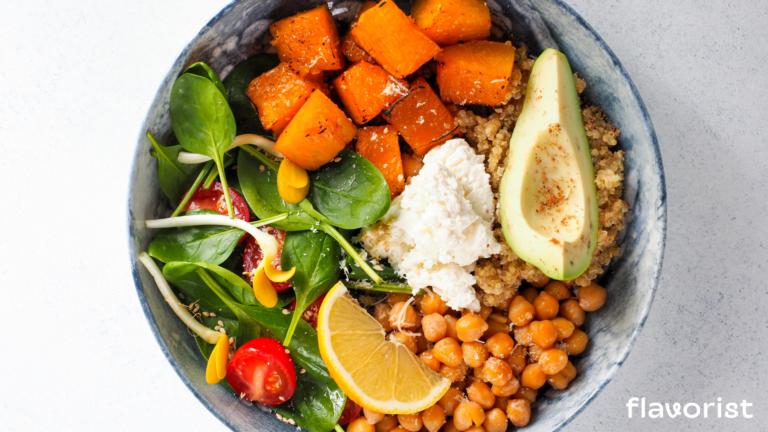
- Overhead Shot: Works best for dishes with intricate arrangements or flat surfaces, such as pizzas, salads, smoothie bowls, and charcuterie boards.
- 45-Degree Angle: A versatile angle that works for most dishes, giving a natural and balanced perspective.
- Side View: Best for layered foods like burgers, cakes, and stacked pancakes, emphasizing height and texture.
- Close-Ups: Capturing details like melted cheese, fresh herbs, or glistening sauces can enhance the visual appeal and make the viewer almost taste the dish.
Experiment with different angles to find what best highlights the textures and components of your dish.
Keep the Background Simple
A cluttered background can distract from the food. Stick to clean, neutral surfaces like marble countertops, wooden tables, or dark slate plates to keep the focus on your dish. Adding a minimal amount of props, such as a rustic napkin, a wooden spoon, or a well-placed fork, can enhance the scene without overpowering it. If using multiple elements, ensure they complement rather than compete with the food. Choosing a color scheme that contrasts with the dish can make it pop even more.
The Art of Food Styling
Plating and garnishing play a huge role in making food look irresistible. A few simple tricks can elevate your presentation:
- Garnishing: Fresh herbs, a light drizzle of sauce, or a dusting of powdered sugar can make a dish look more refined and appetizing.
- Layering & Stacking: Adding height and dimension makes food more dynamic and visually appealing.
- Freshness: Ensure ingredients look vibrant—spritzing fruits and vegetables with water can give them a just-picked glow.
- Steam & Melted Elements: If shooting hot food, capture it while the steam is still rising to create a sense of warmth and freshness. Melted cheese, dripping honey, or oozing chocolate can add to the indulgent appeal.
Editing for a Professional Touch
Even the best shots can benefit from slight post-processing. Editing should enhance the natural beauty of the dish rather than make it look artificial. Use apps like Lightroom, Snapseed, or VSCO to adjust brightness, contrast, sharpness, and saturation. Keep these tips in mind:
- White Balance: Ensuring the colors are true to life prevents unnatural hues.
- Brightness & Contrast: Adjusting these can make details pop without losing authenticity.
- Selective Editing: Use targeted adjustments to enhance key areas while keeping the rest of the image balanced.
- Avoid Over-Editing: Over-saturating colors or applying heavy filters can make the food look unrealistic. Aim for a natural, mouthwatering appearance.
Telling a Story Through Food Photography
A great food photo isn’t just about the dish itself—it’s about the experience and emotions it evokes. Adding a human element makes images feel inviting and personal:
- Action Shots: Capture hands reaching for a plate, someone pouring sauce, or a fork cutting into a soft dessert.
- Process Shots: Show different stages of cooking, from raw ingredients to the final dish.
- Table Setting & Atmosphere: Including elements like a rustic wooden table, cozy candlelight, or an elegantly set plate can create a mood that draws in the viewer.
- Seasonal Touches: Using props and backgrounds that reflect the season can make your photos feel more authentic and relatable. Think of warm tones and cinnamon sticks in fall, or fresh flowers and bright colors in spring.
Final Thoughts
Mastering food photography takes practice, but with the right techniques, anyone can capture stunning images that make viewers hungry for more. Pay attention to lighting, angles, composition, and styling while keeping post-processing subtle yet effective. Whether you’re showcasing homemade dishes or professional culinary creations, telling a story through your photos will set your work apart. The next time you pick up your camera, focus on not just photographing food, but creating an experience that leaves a lasting impression.
Read More ブログ

